Frequently Asked Questions About Going Solar
Solar FAQs: Table of Contents
This page provides a collection of clear, concise answers to the most frequently asked questions about solar power. It is designed to introduce you to the fundamental concepts of solar as you consider adding solar panels to your home, business, or off-grid property.
Answers on this page are designed to be as concise as possible, but where available, we'll provide links to articles that cover these topics in greater detail.
Use this table of contents to jump straight to the section you are interested in:
- General Concepts
- Feasibility Assessment: Is Solar Right For Me?
- Choosing the Right Solar System
- Grid-Tied Solar Overview
- Off-Grid Solar Overview
- Battery Backup System Overview
- Financial FAQs
- Investing Into Solar
- Solar Incentive Programs
- Solar Financing Options
- System Design FAQs
- Component Selection Guide
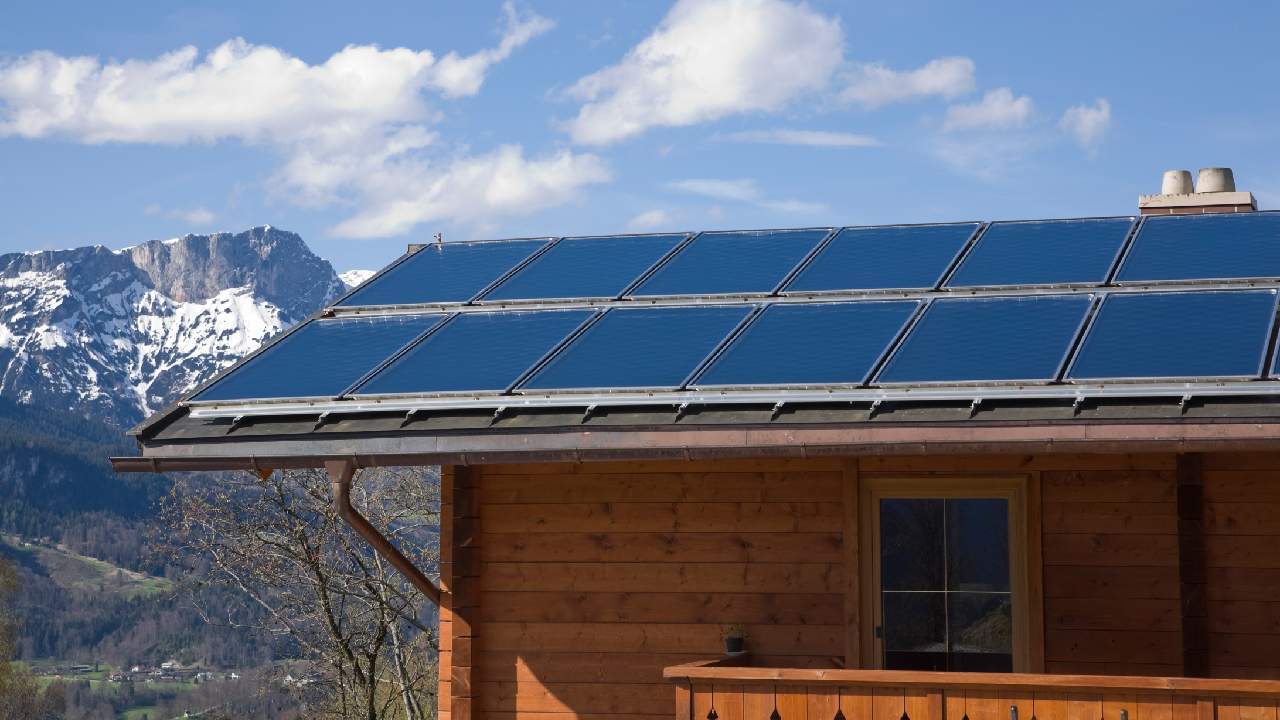
- Solar Panels
- Inverters
- Batteries
- Racking
- Installation FAQs
- DIY Solar Installation FAQs
- DIY Permitting FAQs
General Concepts
Basic information about the fundamentals of solar power.
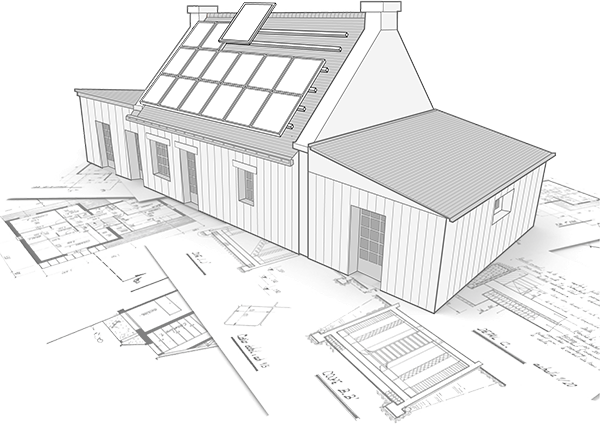
Solar panels capture sunlight and convert it to electricity, through a process known as the photovoltaic effect. An inverter converts DC (Direct Current) from panels into AC (alternating current), the format used to power most household appliances. The energy generated by solar panels is stored either in an on-site battery bank, or in the local utility grid.
Core components:
Solar panels convert sunlight into electricity.
Inverters manage the flow of power throughout the system, converting DC (Direct Current) to AC (Alternating Current) to interface with appliances or the grid.
Mounts / racking materials provide a stable foundation on which the system is built.
Batteries store energy locally on-site. (Mandatory for off-grid, not required for grid-tied systems.)
Charge controllers regulate rate of charge and discharge in battery-based systems, extending the lifecycle of the battery bank.
Supplemental components:
Monitoring systems provide an app or web interface to track real-time system performance.
Combiner boxes merge DC inputs from several panel strings into a single output, simplifying connections to the inverter.
Wiring and cables connect the parts of your system together. Proper wire size is important to minimize voltage drop, ensuring your system meets its rated output.
AC/DC disconnects and rapid shutdown devices allow you to safely switch power from solar on and off, which is necessary to comply with safety regulations in most jurisdictions.
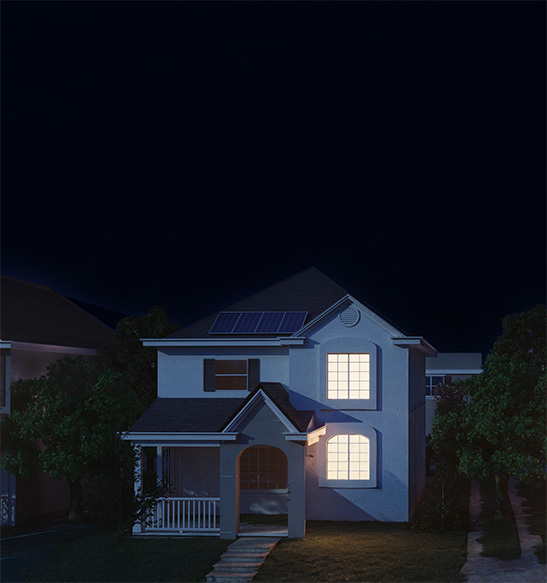
Grid-tied systems connect to the utility grid, which stores power generated by solar panels. These kits eliminate the need for battery storage, allowing you to maximize electric bill savings.
Off-grid systems store solar energy in a battery bank, which acts as the primary method to supply power to the property. These systems generate power in remote locations where no utility grid connection is available.
Battery backup systems connect to the grid, but include a smaller on-site battery bank for automatic backup power in case of outages. Useful to protect critical loads, like technical infrastructure or medical equipment, which require uninterrupted power in case of grid failure.
Feasibility Assessment: Is Solar Right For Me?
Determine whether going solar makes sense for your circumstances.
The Pros:
Save money: grid-tie solar is cheaper than utility power; off-grid solar is cheaper than other methods of remote power delivery, like wind, hydro, or gas generators.
Increase property value: solar-equipped homes sell for more money, allowing you to recover some of your investment if you move homes
Energy independence: control how much power you produce and protect yourself against rate inflation from the utility company
Reliable: solar is an established commodity with very low failure rates
The Cons:
High up-front costs: solar requires an initial investment in the 4-5 figure range; it’s not feasible for everyone
Long payback period: turnkey solar systems may take up to 20 years to pay for themselves; it’s a long-term play, not an immediate cost-cutting solution. (DIY solar installation helps dramatically, by cutting the payback period nearly in half.)
Location-dependent performance: solar’s overall performance depends on many factors including your exposure to sunlight, shading, roof orientation, local incentives, and your jurisdiction’s attitude toward permitting.
Not for renters: building permits must be filed by the homeowner, which means renters usually don’t have access to solar (without their landlord’s permission).
More info: The Pros and Cons of Solar Power
A quick checklist to help determine if your site is ready for solar:
Roof condition: Rooftops must meet structural engineering standards to meet the load-bearing requirements to support the weight of your solar system. Old or damaged rooftops may need repairs or replacement to bring them up to standards.
Electrical panel compatibility: Your panel must be rated to handle the voltage from solar and have available connections to plug in. Old panels with aluminum wiring are unsafe and must be replaced. Check compatibility before proceeding with solar.
Roof orientation: South-facing is best. East and West are serviceable. North-facing rooftops will not work. (We are located in the USA, so this advice applies to the Northern Hemisphere. If you live in the Southern Hemisphere, the advice is flipped: solar will work best on a North-facing roof.)
Build space: if a roof mount is not viable, solar can be built on a dedicated ground mount, but this requires ample room on your property and additional costs to build.
Shading: Solar panels need sunlight to function. Shade from trees, vents, or other obstructions will limit output from your panels.
Yes, solar typically pays for itself over the life of the system - though the payback period can change dramatically based on local site conditions, as well as your approach to installation. The typical DIY solar project pays for itself in 9 years on average, while turnkey installations offset their costs in about 18 years. With solar panels warrantied for 25+ years, under average circumstances, system owners enjoy years of free power once the system is paid for.
Learn more: The ROI of going solar
Choosing the Right Solar System
Advice on picking the right system type and components for your specific use case.
Grid-Tied Solar Overview
Grid-tied systems store solar power in the utility grid, rather than in a battery bank. Under a net metering agreement with the utility company, solar homeowners receive credits for solar power sent into the grid. Those credits can be used to power your appliances anytime - even at night or in winter, when the sun isn’t out.
Grid-tied systems are designed primarily to cut electricity costs. The lack of a battery bank keeps up-front costs low, maximizing electric bill savings over the life of the system. It’s a long-term investment: over the 25+ year life of the warranty, generating electricity from solar panels is almost always cheaper than buying power from the utility.
Like a bank account: you deposit solar energy into the grid. The utility keeps a balance of credits for the power you generate. You withdraw credits from that balance when you use electricity to power your appliances. Net usage (power generated minus power used) is tracked by a meter on your property, hence the term “net metering.”
No. Since grid-tied systems store power in the utility grid, your power goes out when the grid goes down. Consider a battery backup system for uninterrupted power during outages.
Off-Grid Solar Overview
Off-grid solar systems are designed to generate power in remote locations where utility grid access isn’t available.
Off-grid solar is a great solution to generate power in areas where it is not feasible to connect to power lines. The primary use case is fully remote cabins or homesteads away from the grid, but it can also be the right solution for cabins, workshops, or barns set away from a grid-powered home. Small off-grid systems also work for RVs, boats, and other mobile applications.
Generally, yes. Off-grid solar costs less than wind and hydro power unless the latter are set up in perfectly optimal conditions. It’s also much cheaper than running a utility line to your property, except perhaps for extremely short distances, like a short drop from a utility-powered home to a non-powered barn or workshop.
It’s a complex process, but here’s a brief overview:
Make a list of the appliances you expect to run off batteries, and their power draw (wattage).
For each appliance, list how many hours you expect to run them each day.
Multiply wattage x hours run per day for each appliance.
Add up the totals to calculate your total daily usage (in watt-hours).
There will be efficiency loss in the system. Multiply by 1.5 to oversize the system to account for these inefficiencies.
Multiply by the number of days of autonomy needed - the amount of time you can run off batteries without recharging from solar. (This accounts for cloudy/stormy days, where solar production is non-existent.)
Your final figure will represent the amount of battery capacity needed, in watt-hours.
Depth of discharge (DoD) dictates what percentage of battery capacity can be safely used before the battery bank must be recharged. We recommend 50% DoD for lead-acid batteries and 80% DoD for lithium batteries. To calculate battery capacity needed, multiply your total watt-hours by 2 for lead-acid batteries, or by 1.2 for lithium batteries, to account for proper DoD.
For a thorough explanation of off-grid system sizing, read our complete Off-Grid System Sizing Guide.
Carefully track and limit usage: use appliances only when necessary; turn off lights, power blocks, and other appliances when not in use.
Energy-efficient appliances: invest in appliances that consume less electricity.
Use a backup generator: consider running energy-hogging appliances (like an air conditioner) off a backup generator when necessary so that you don’t drain your battery bank’s capacity quickly.
Yes - most people add gas generators to supplement power generation during extended storms where solar panels cannot sufficiently recharge the battery bank. Generators should not be the primary power delivery method, but they are essential to spell long stormy periods without sunshine. Generators are also used to power appliances with high consumption demands that cannot feasibly run off battery power.
Battery Backup System Overview
Battery backup kits primarily function as grid-tied kits, but add a small backup battery bank which automatically kicks in for uninterrupted power during outages.
In areas with severe weather or unreliable power grids, battery backup systems provide an extra layer of protection against power outages. Backup power kicks in automatically when the grid fails, providing uninterrupted power to medical equipment, technical infrastructure, and other critical power loads.
It depends on which critical appliances you need to function during outages, and how long you need those appliances to function independent of grid power. Make a list of critical appliances, look up their power draw per hour, then multiply by the number of hours you need those appliances to run on backup power.
Yes, but pay careful attention to equipment compatibility for your intended use case. Hybrid inverters function with or without the grid, but purpose-built off-grid or grid-tied inverters may be more efficient if your use case changes. Switching from a hybrid to a pure off-grid system may require an inverter replacement that is designed exclusively for off-grid use.

Financial FAQs
The dollars and sense of going solar.
On average, solar pays for itself in 9.2 years (for DIY-installed systems) to 18.4 years (for turnkey systems). With most solar panel warranties lasting 25+ years, solar usually costs less than utility power over the same time frame. These figures vary dramatically based on a host of factors, including total energy usage, location, available incentives, and utility net metering policies. Evaluate the math based on your real-world circumstances, not generic benchmarks or cost calculators on the internet.
Your payback period is the amount of time it takes for solar to offset your electric bills and pay for itself. To calculate payback period, divide the cost of your system (after incentives) by the annual cost of electricity from the utility. This will determine how many years it will take for solar to offset your electric bills and pay for itself.
Learn more: How to calculate Solar ROI and Payback Period
Simply calculate the amount you expect to pay in electric bills over a 25-year period (the typical solar panel warranty), then subtract the total cost to install a solar power system that would offset that same energy usage. Once you break even on the initial system cost, your profit is represented by the amount of electric bills you eliminate over the remaining life of the system.
Learn more: How to calculate Solar ROI and Payback Period
Availability of incentives: Programs like tax credits and rebates reduce the initial cost of solar, leading to faster payback period and more savings over the life of the system.
Local cost of electricity: The value of solar is comparatively higher in areas with high cost of electricity, and lower in areas with low cost of electricity.
Total energy usage: Properties with very high usage stand to benefit more from solar. The higher your electric bill, the more you stand to save by replacing it with solar.
Net metering policies: Some utilities buy and sell electricity at equal rates, while others pay a reduced rate for solar power sent into the grid compared to the rate they charge customers for consumption. If your utility buys solar from you at a discounted rate, it takes longer to pay off your investment into solar.
Local sun hours: Areas with more sunlight, like Arizona, generate solar power at a much greater rate than non-sunny areas, like Michigan. Areas with more sunlight generate solar power more efficiently, which means you need to spend less on your system to generate the same amount of power as you would in less sunny areas. Lower system costs = faster payback period and better ROI.
Solar Incentive Programs
Info on tax credits, rebates, and other incentives that reduce the financial burden of going solar.
Not anymore. There was a longstanding program offering a 30% tax credit on solar projects, but it expired on 12/31/25 and is not currently active. However, there may be state or local incentives available to reduce the cost of your solar project.
More info: The Federal Solar Tax Credit Expired 12/31/25. Here’s How the ROI of Solar Has Changed.
Tax credits: A deduction that reduces the amount of tax you owe if you invest into solar. While the federal solar tax credit is no longer in effect, there may be local incentives available which reduce your state tax burden.
Rebates: Programs which offer money back on eligible products, claimed by filing and submitting a rebate form.
Component discounts: Immediate reduction in purchase price of eligible products (no rebate required).
Solar Renewable Energy Certificates (SRECs): Depending on local policies, businesses may be mandated to meet certain clean energy goals by sourcing a certain percentage of their power consumption from renewable sources. Instead of installing solar themselves, they can pay for certificates from external producers of clean energy to meet these requirements. In areas with eligible programs, solar system owners can sell SRECs representing unused solar power to these businesses for an additional profit.
Favorable net metering policies: In rare cases, utilities may pay more for power generated by solar than the standard rate they charge customers for consumption. Some also allow solar customers to oversize their system up to a certain limit (say, 120% of consumption) and sell excess power back to the utility. More favorable net metering policies allow solar homeowners opportunities to turn additional profit from the energy their system produces.
More info: Overview of State Solar Incentives for All 50 States
The Database of State Incentives for Renewables and Efficiency (DSIRE USA) is the authoritative source to look up state and local solar incentive programs. Simply punch in your ZIP code to pull up a list of incentives available in your area.
Solar Financing Options
Info on securing financial assistance to pay for your solar power system.
It’s always better to buy and own your system if your budget allows for it. Financing your system generates fees and interest payments, which cut into your electric bill savings.
“Solar loans” are simply personal loans marketed specifically for solar system installations. While they may offer better terms than general personal loans, they are not widely available for DIY solar, because they are usually offered on the condition that you partner with a turnkey solar provider of the lender’s choice. In general, it is much easier to find unsecured personal loans from a bank or credit union.
A home equity loan allows homeowners to borrow against the equity in their home to pay for a solar installation. They offer better rates than unsecured personal loans, but the tradeoff is that the value of the home is used as collateral. If you default on your loan payments, it could result in repossession of the home in a worst-case scenario.
Like home equity loans, a Home Equity Line of Credit (HELOC) uses your house as collateral to secure financial assistance. Unlike home equity loans, HELOCs designate a certain amount of funding (say $50,000) which you can draw from as necessary to complete your project. You only pay interest on the amount you actually borrow, not the full approved amount.
A solar lease is a program where a third-party company foots the bill to install a solar power system on a homeowner’s roof, then recovers their investment by charging the homeowners a flat monthly fee to use the power generated by the system. Solar leasing fees are often slightly lower than the cost of buying power from the utility, but still dramatically more expensive over the long-term than simply buying and owning a system outright. We heavily discourage solar leasing as it dramatically eats into the long-term ROI of going solar.
Learn more: Comparing Solar Financing Options
Similar to solar leases, homeowners contract a third-party company to install a solar power system on their roof at no up-front cost. The installer then charges the homeowner a set rate to use power generated by the system (much like buying from the utility, albeit at a slightly reduced rate). While leases charge a flat rate to freely use the entirety of production from the solar system, PPAs set a reduced rate and bill based on actual consumption.
Our attitude toward PPAs is the same as leases: they introduce an unnecessary middleman which eats away most of the value of going solar, and should be fiercely avoided in favor of buying and owning your system outright.
More info: Comparing Solar Financing Options
System Design FAQs
Common technical questions about system sizing, design, and layout.
The basic formula to calculate system size is:
Daily kWh usage ÷ Daily Sun Hours ÷ Inefficiency Factor = Solar Kit Size
Daily kilowatt-hour usage can be found by tallying a year’s worth of electric bills and dividing by 365.
Daily sun hours will depend on how much sunlight you get in your location. Use a tool like PVWatts to look up sun hours in your area.
We use an inefficiency factor of .85 to account for panels which are 85% efficient at the end of their lifecycle, but some panels are more efficient than others. Check the efficiency rating in specific solar panel warranties for a more accurate calculation.
Once you arrive at a target kit size, divide by the rated wattage of your solar panels to learn how many panels you will need. For example, A 6 kW (6,000-watt) system built with 500-watt panels will require 12 solar panels in total (6,000 / 500 = 12).
Learn more about the intricacies of system sizing: How Many Solar Panels Do I Need?
In string inverter systems, strings (or groups) of panels are plugged into a central string inverter which manages the flow of energy throughout the system. String inverters are rated for total capacity (for example, 9kW), with multiple string inputs that add up to the total capacity (for example, 3 inputs with a capacity of 3kW each).
String sizing refers to the design principle of limiting the number of panels connected in a string so that it does not exceed the rating of the inputs on the inverter. It is strongly recommended that string sizes are balanced equally for best performance.
These limitations are removed in micro-inverter kits, which attach an individual inverter to each panel in the system.
There are complex calculations based on the distance of the wire run and the voltages of each component in the chain, but here are some general benchmarks:
Under 50 feet: #10 or #8
50-100 feet: #6 or #4
100+ feet: #2 or larger
In general, longer runs need larger wire gauge to combat voltage drop, and lower-voltage components necessitate larger wire gauge than higher-voltage components for the same reason. Work with your solar designer to help you pick the right wire gauge based on the specific details of your project, as the variations are impossible to cover in the context of this FAQs article.
In general, heating and cooling units have very high continuous power draw (an estimated 500-1500 watts of usage per hour) which makes them prohibitively demanding to run on all but the highest-capacity solar kits. For reference, a medium 10,000 BTU window AC unit might draw 8-10 kWh of energy per day. That might be 8-10 extra panels in a grid-tie system just to run AC, and if you need battery storage to run the unit off-grid, those kits start around $5k. Remember, this is just the cost to run your window AC - we’re not taking any other household appliances in effect.
Mini split units (which run on both AC and DC power) can be more efficient because they tend to run at lower wattages, and don’t suffer efficiency losses in the conversion from DC to AC. Still, they are energy hogs compared to most household appliances, and usage should be limited in all but the most powerful systems. It is strongly recommended to find more energy-efficient alternatives, like box fans, to keep the demands of A/C units in check.
Component Selection Guide
Information to help you choose the right parts as you design your custom solar system.

Solar Panel FAQs
Most solar panels are warrantied for 25 years, with some offering 30+ year warranties. In a recent study, NREL concluded that 80-90% of installed solar systems met or exceeded production expectations through their entire lifecycle, with panel failures being exceedingly rare, at a rate of less than 0.2%.
More info: How Long Do Solar Panels Last?
Solar panel warranties are split into two parts. Performance warranties last 25+ years and typically guarantee that panels will produce 85-90% of their rated output at the end of the panel’s lifecycle. Workmanship warranties are often shorter (10-25 years) - they guarantee replacement in the case of physical manufacturing defects, like bent frames.
60-cell solar panels measure about 5.5 feet by 3.25 feet, while 72-cell solar panels measure about 6.5 feet by 3.25 feet. Standard residential solar panels are sized to match one of these two configurations, with little variation.
You may encounter listings for 120-cell and 144-cell solar panels. These panels use half-cut cells for improved efficiency, but the panels themselves are the same physical size as 60-cell and 72-cell panels respectively.
Solar panels efficiency measures the rate at which a panel can convert sunlight into usable energy. As of 2026, standard home solar panels carry an efficiency rating of 20-23%, while high-efficiency solar panels operate in the 23-30% range. They squeeze a bit more power out of panels of the same form factor, which can be useful if build space for your project is limited.
Monocrystalline (mono) - standard, moderate-efficiency panels with cells cut from a single silicone crystal. Most popular choice for the typical home solar install. Best value for the money.
Polycrystalline (poly) - solar cells made from a blend of multiple silicone sources. Slightly lower efficiency.
High-efficiency - Premium panels in the 23-30+% efficiency range, useful for packing more solar into a very tight build space.
Bifacial - Panels with cells on both sides (faces) of the panel. Maximizes output, especially for ground mount or pole mount installs with a reflective back surface.
Flexible - panels that can bend to mount at any angle, useful in difficult build spaces, or for RV/boat/camping applications
Solar panels are most effective when they have full access to sunlight. Panels may work at reduced effectiveness if snow accumulates on the face of the panel. Systems still work on sunny, snowy days if you scrape snow off the face of the panels. Systems built on a pitched roof can naturally help with this, because the angle of the panels causes light patches of snow to slide off.
At least partially - especially with the help of micro-inverters or power optimizers. Solar panels contain several cells (usually 60 or 72) in an even grid. Cells which are shaded won’t function, but cells that aren’t shaded will still work. This means that a partially obstructed panel will still produce some of its rated output.
No, but with the help of energy storage, the energy generated by solar panels during the daytime can be used at night to run your appliances. In grid-tie systems, the utility grid acts as storage, so you can call upon that power anytime. For off-grid systems, a local battery bank stores production from your panels for usage overnight.

Inverter FAQs
Inverters manage the flow of power throughout the system, converting DC to AC if necessary, allowing electricity generated by solar panels to be stored in the grid or used to power household appliances.
Several panels are linked in a string (or group) of panels, with the entire string routed through an input on a central inverter unit. String inverter systems generally cost less than other systems; however, they suffer reduced output in shaded environments.
Micro-inverters are smaller inverter units that attach to each individual solar panel in a system. Each micro-inverter is paired with its own solar panel, offering greater shade mitigation and flexibility for future system expansion.
Power optimizers are small units that provide some shade mitigation for string inverter systems. Like micro-inverters, they attach to every panel, however they differ in that the panels are still wired through a central string inverter.

Battery FAQs
Batteries are only necessary if you want to store energy from your solar panels on site. They are not needed for grid-tie systems, which rely on the utility grid as their method of energy storage. However, off-grid systems and backup power systems both rely on battery banks as their local storage method.
Small 1-3 kWh kits will cover light usage for day hikes or weekend camping trips off the grid, while larger 5-15+ kWh battery banks (with a solar array to match) would be appropriate for fully sustainable off-grid homesteads. In truth, your needs are determined by calculating your expected loads (the total power draw of appliances you plan to use on a daily basis) and the amount of autonomy needed - the number of days your property can run on battery power before recharging from solar.
Read our guide on sizing battery banks for your expected usage: Battery Bank Sizing Guide
Backup power systems generally require lower storage capacity, because they are expected to function for a limited time period (minutes to hours, rather than days) before grid power returns. Of course, it depends on what loads you need to power, and for how long. If you’re concerned about prolonged outages - for example, areas with an unreliable power grid or severe winter storms - you may need a purpose-built backup power system with more storage capacity for extended use periods.
Lithium batteries - efficient, long lasting, and no maintenance requirements. The most popular and economical choice for home energy storage.
AGM batteries - sealed batteries with shorter lifespans, which perform especially well in severe cold.
Flooded lead-acid batteries - battery compartment contains a liquid electrolyte which must be refilled on a routine basis. Shorter lifespans, higher maintenance, and less cost-effective overall.
Learn more: Why lithium solar batteries rule the market

Racking FAQs
Roof mounts cost less because they make use of your roof’s foundation to support the weight of the panels. Ground mounts take more materials to build, but they offer the most control over the tilt/angle of your panels to optimize production - and they are a lot easier to clean and maintain.
Learn more: Ground mounts vs. roof mounts
A pole mount is a simple vertical pole with brackets to attach a small group of solar panels. Pole mounts are useful to provide vertical clearance over snow banks or other obstacles, like the lip of a flat-top roof. Pole mounts are generally reserved for smaller arrays where additional height is needed to clear an obstacle.
Solar trackers are special mounts which follow the position of the sun throughout the day, automatically adjusting panels so they always face directly into the sun. Trackers help squeeze a bit of extra production out of panels in the system. They are too costly for most home solar installs, but they are well worth it in large utility or commercial-scale projects.
Installation FAQs
Questions about buying a solar kit and sourcing an installer locally.
Local solar installers may reasonably charge 70 cents to $1.10 per watt for installation labor (assuming you provide the solar kit yourself), which equates to $3,500 - $5,550 for a 5 kW system.
This estimate is based on a 2024 NREL study, which suggests national turnkey providers charge about $2.68 per watt of installed solar (equipment included), of which 54% goes to overhead costs.
Learn more: DIY vs. full-service install costs
Populated areas in solar-friendly jurisdictions tend to have more competitive rates, because more installers are available to take advantage of widespread solar adoption. Competition between installers tends to drive rates to the lower end of the scale (around 70 cents per watt).
In less solar-friendly states, and isolated rural areas, there can be long waitlists and high quotes if very few options are available.
At minimum, a C-10 license for general electrical work. NABCEP board certification is nice to have, but not mandatory. The main thing to look for is experience and proof of quality work in the past. A specialized “solar installer” is not necessary - more and more, you’ll find general contractors with experience installing solar systems.
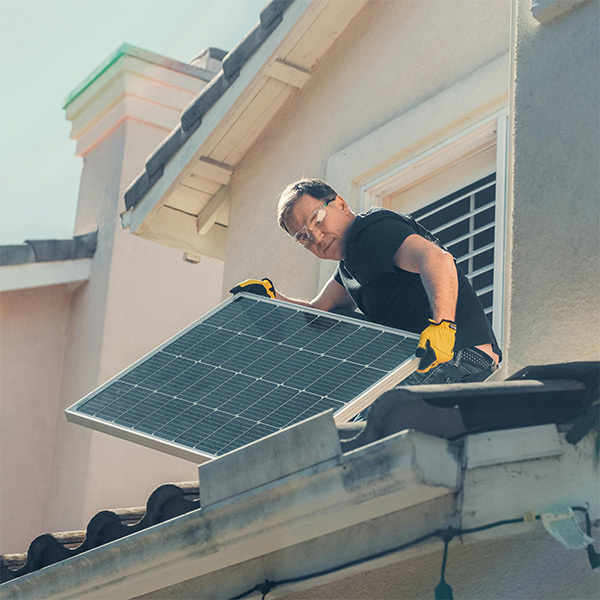
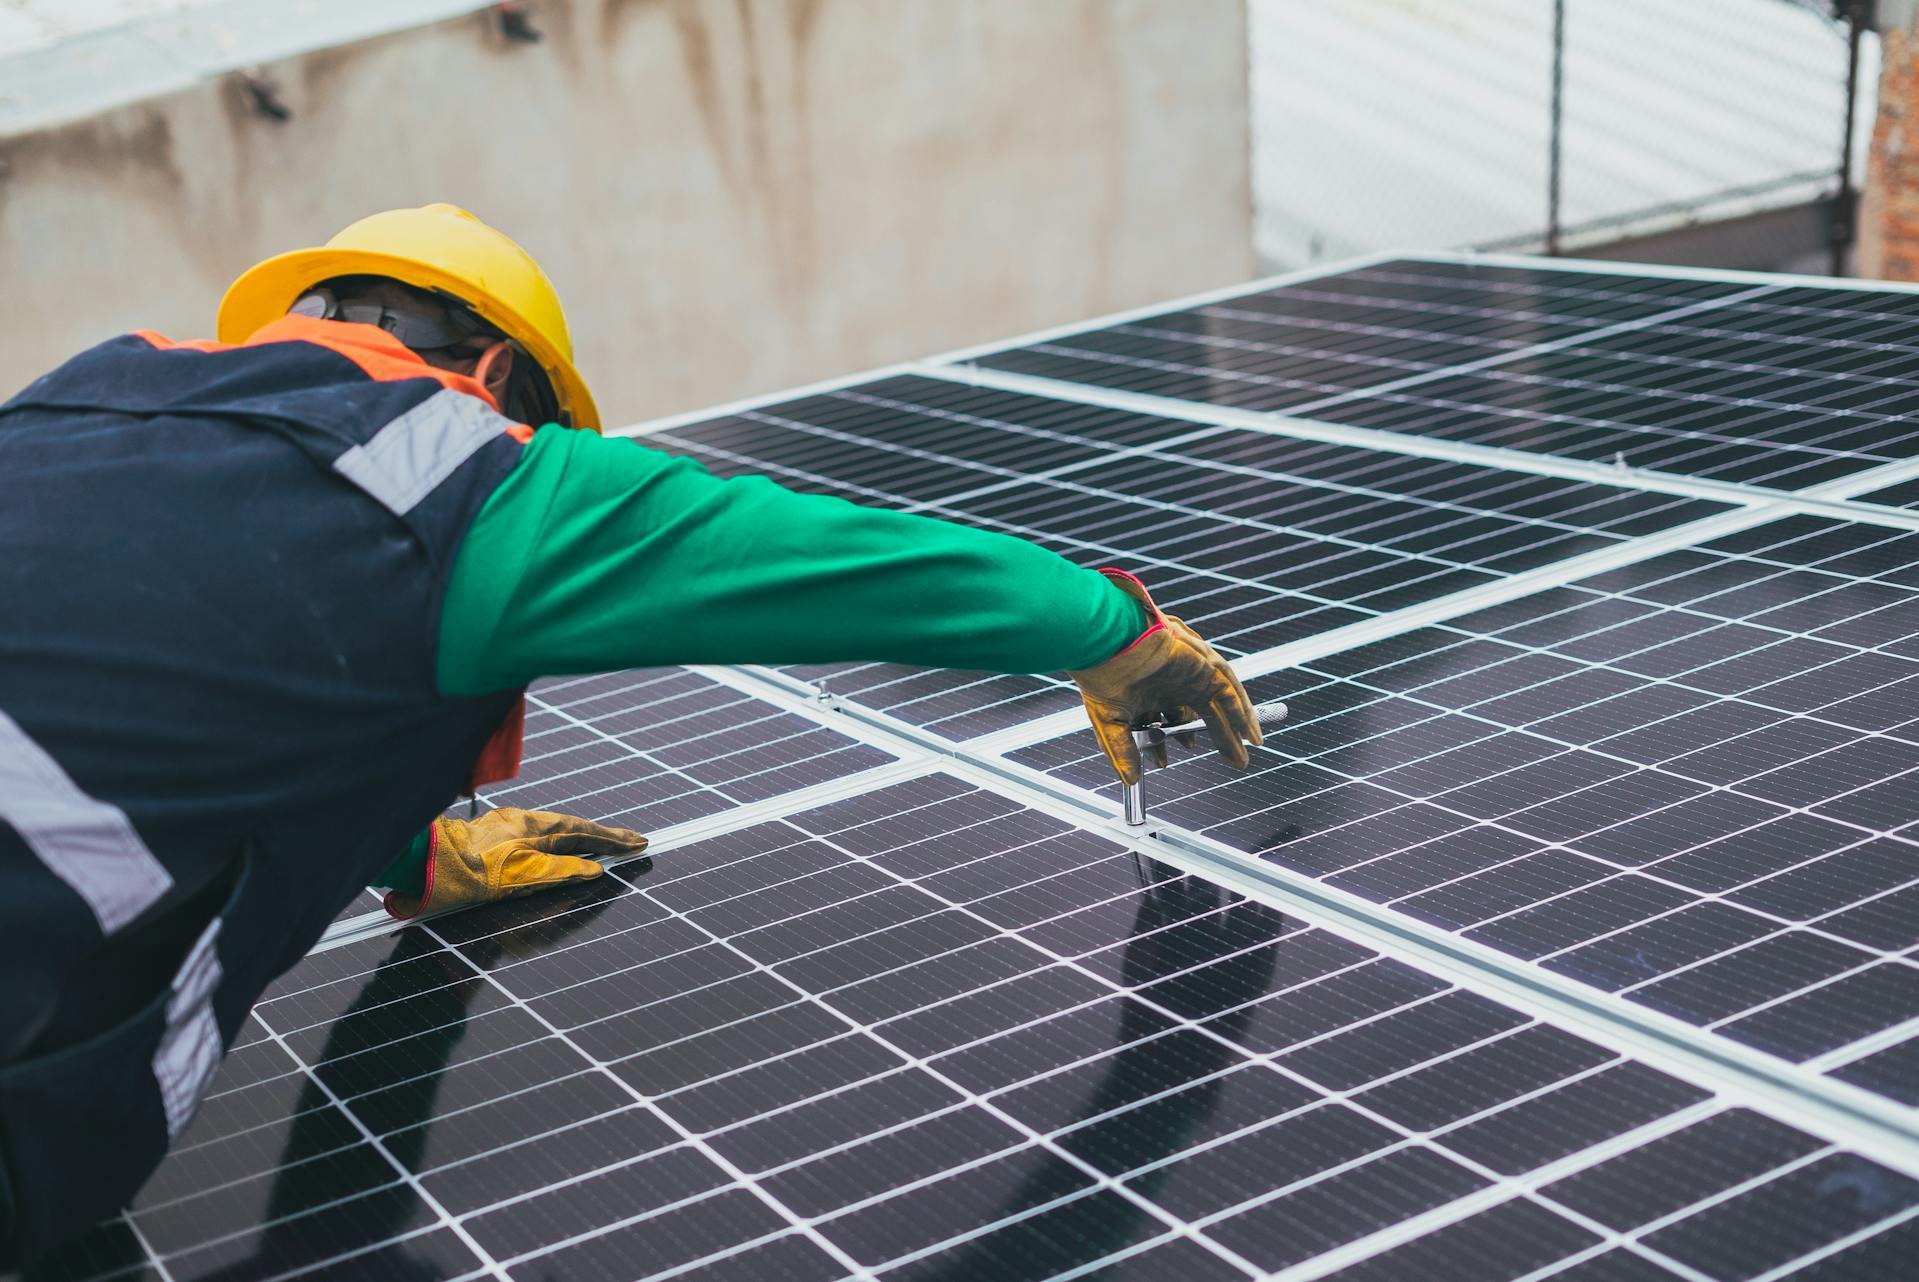
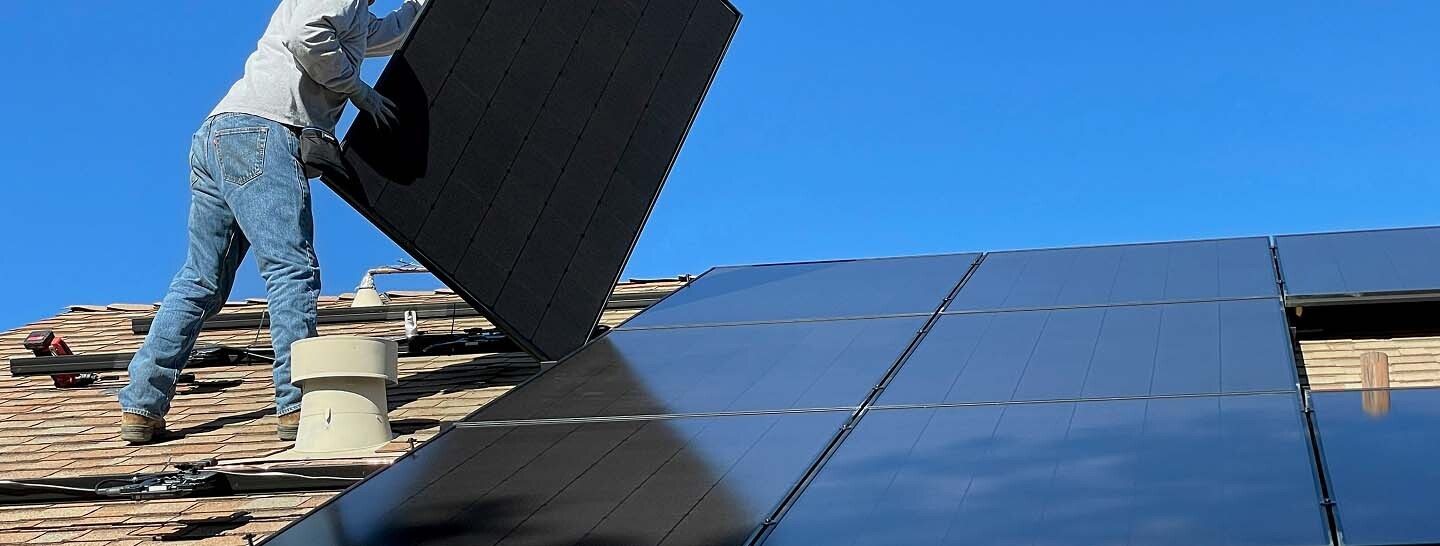
Yes, if you’re physically capable and comfortable with basic tools, DIY solar is absolutely possible. As a (very) broad overview, you will need to bolt a stable foundation to your roof rafters, build racking rails, fasten panels to your racking, and cable the system together. Most people hire a certified electrician only for the final electrical panel hookup. For the DIY-inclined, it can be a great way to save on installation costs.
DIY Solar FAQs
Questions about installing your own solar system.
Installing solar panels is not trivial, but it's well within reach for most people who are comfortable with basic physical work and willing to follow detailed instructions. Panels weigh up to 50 pounds, and need to be hoisted for rooftop installs. Metal footings are screwed into a solid foundation (either roof rafters or a dedicated ground mount), racking rails are attached, and panels are mounted onto the rails. Some basic plug-and-play cabling is required between panels and inverters.
The entire system can be built by a competent DIYer. Most people who DIY install need only hire a licensed electrician for the final electrical panel hookup (which may be required in some jurisdictions).
A recent market research study analyzing bids from solar installers suggests that about 40% of project costs are spent on hardware (solar panels, inverters, mounts, etc), while the other 60% is budgeted for “soft costs” - things like installation labor, company marketing costs, payroll, office space rental, and profit margins.
This means that DIYers who choose to install their own solar kit - after accounting for modest project costs like equipment rentals and permitting fees - could reasonably install their system for 40-50% less than the bid from a third-party installer.
While most of the cabling between solar panels and inverters is safe and plug-and-play in nature, there is more serious electrical work involved in the final step of connecting the system to the household electrical panel. It is strongly encouraged to hire a licensed professional electrician for this step, and in some jurisdictions, it may be a required step to pass the inspection process.
In most places, yes, though some jurisdictions are unfriendly to DIY home improvement projects of any sort. Check permitting codes to be sure your local office is friendly to DIY projects for new constructions.
Our DIY Solar Resource Center contains a list of in-depth articles with guidance on common system design, permitting, and installation questions.
DIY Permitting FAQs
Questions about providing proper documentation when you file for your permits.
In well-populated jurisdictions with established solar permitting procedures, typical solar projects see their permits approved in about 1-3 weeks.
In less populated areas with understaffed permitting offices, processing times can extend significantly - up to 3-6+ months in outlier cases.
We recommend filing for your permit as soon as you have your order confirmed, so that your permit has lead time for approval while components re being shipped.
Different jurisdictions have different requirements, but some common inclusions in a permit application are:
Spec sheets: complete technical specs for every major component in your system
Electrical line diagrams: Single-line and three-line diagrams showing how electricity flows through your system. Must include wire sizing, breaker ratings, and all connection points.
Site plan: Overhead property view showing exact panel placement, including clearances from roof edges, obstructions, property line setback requirements, and fire access pathways.
Load calculations: Engineering calculations proving your roof or ground mount can handle equipment weight, wind loads, and snow loads specific to your climate zone.
Learn more: DIY Solar Permitting Guide
There are two separate applications: an interconnection agreement with your utility company, and building permit with your local permit office, or AHJ (Authority Having Jurisdiction). One is an agreement that allows you to connect your solar system to the grid for storage, while the other gives you permission to start a new construction project on your property. They are filed with separate offices and have separate application processes, but should be filed simultaneously so that there are no unnecessary delays during the installation process.
Free Download: DIY Solar Planning Toolkit
DIY solar has a lot of moving parts: complex permitting applications, unexpected roadblocks, and complex ROI calculations that account for hidden costs and changing utility rate structures. We've compiled everything into one workbook so you can track it all in one place.